This installation guide is suitable for all CyberBukit scripts.
All CyberBukit scripts come with an installer, you only need to follow several steps and get installed in a few minutes.
1. Upload files to your server
Make sure you upload all files to your site directory (either root directory or sub-directory), including the .htaccess file (in Windows it may be hidden as it starts with a dot).
2. Open your URL
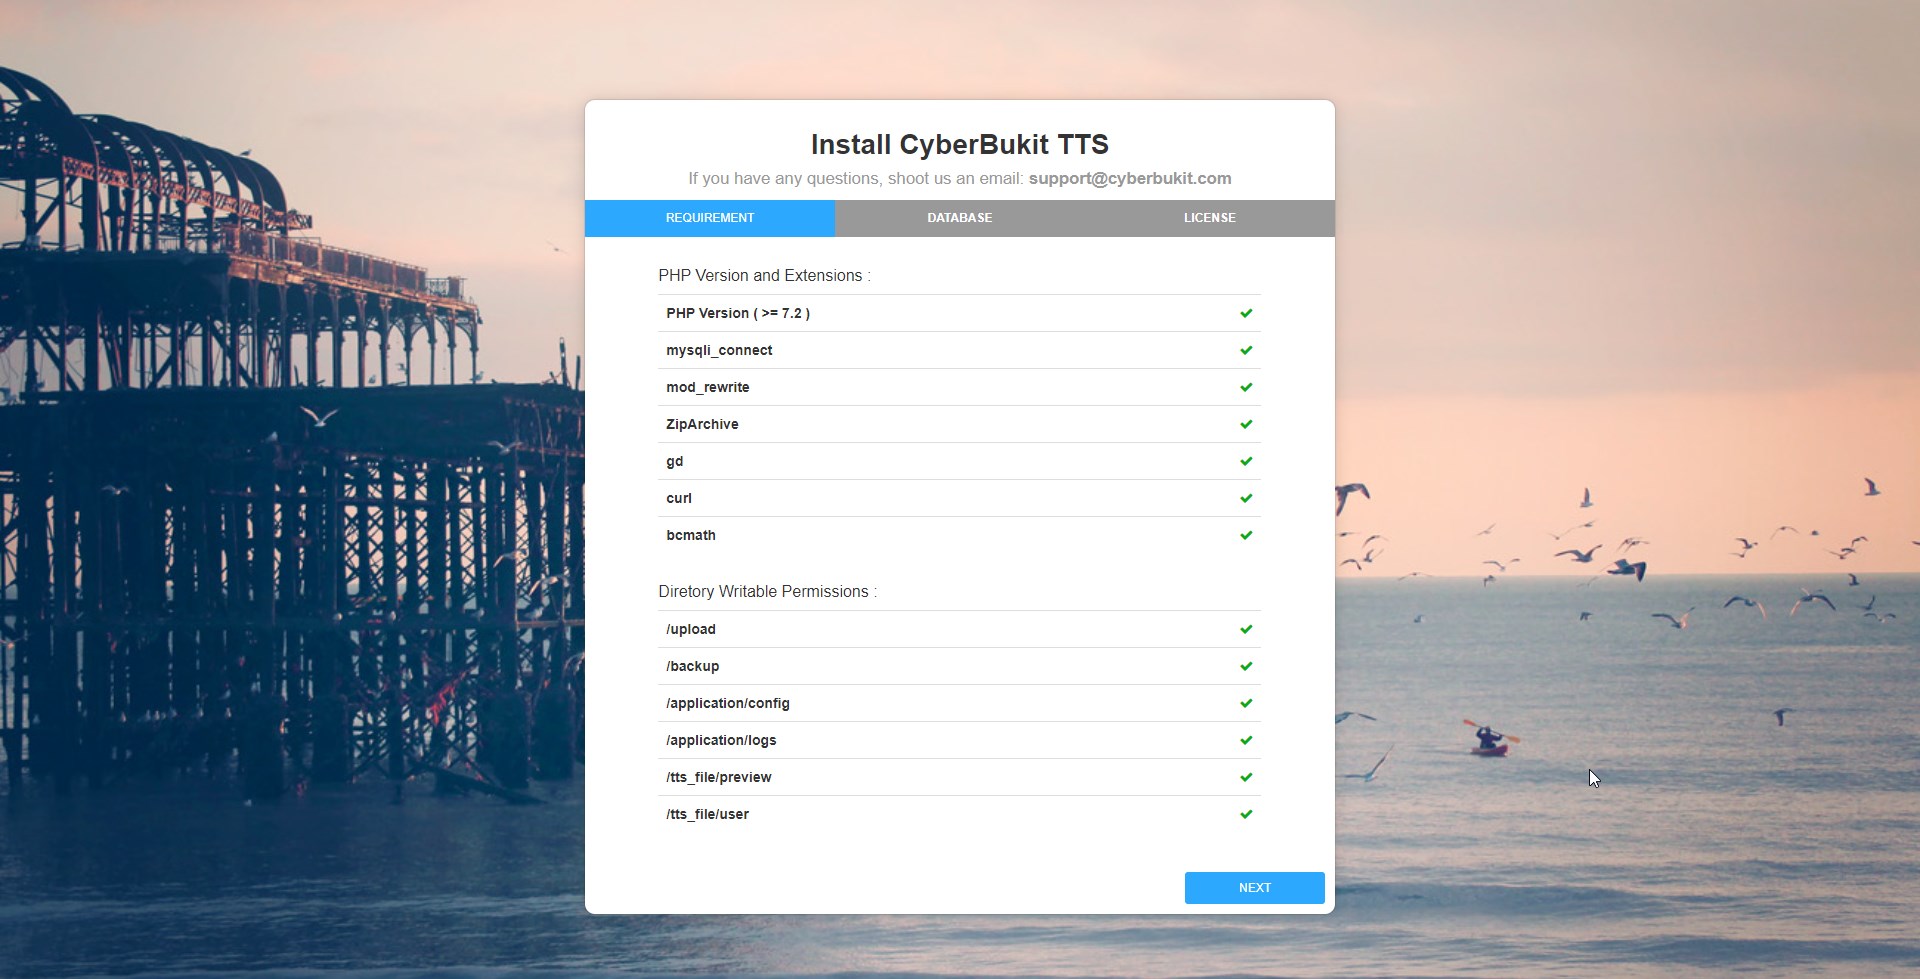
Open your URL. You will be redirected to the installation page. The installer will check the server requirements, make sure your server meets all requirements. Here is the typical page you will see (it may vary depending on specific scripts, but overall it's quite similar).
In some circumstances, there may be a question mark instead of a tick mark. This happens if the installer is unable to check whether the component is enabled. But it doesn't matter, you can proceed, it can be resolved later if there really have problems.
Important: For the 'Directory Writable Permissions', grant writable permission to the directory itself only. But for the 'upload' directory, you need to grant writable permission to the 'upload' directory, its sub-directories and all the files in it, except the .htaccess file.
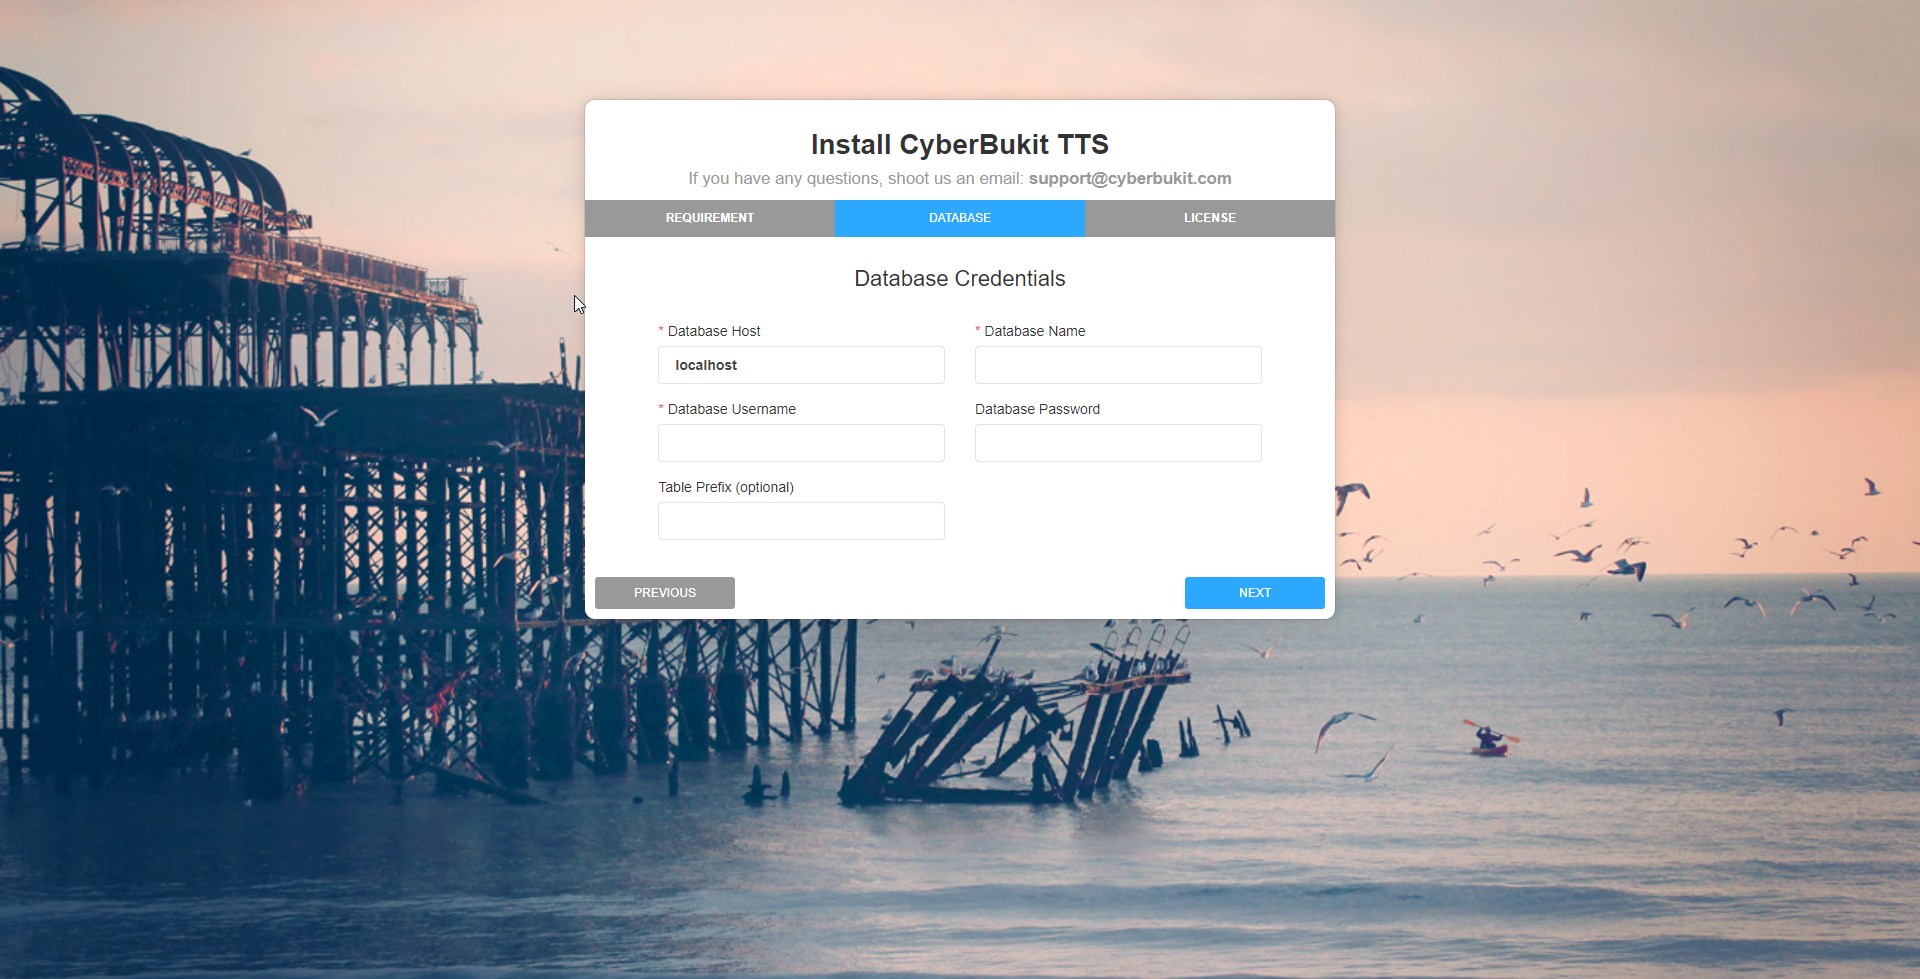
3. Enter your MySQL credentials
You can create the database and its credentials through cPanel or phpMyAdmin. The 'Table Prefix' is optional, it's used to append the prefix to the table names. Generally, you only need to leave it empty.
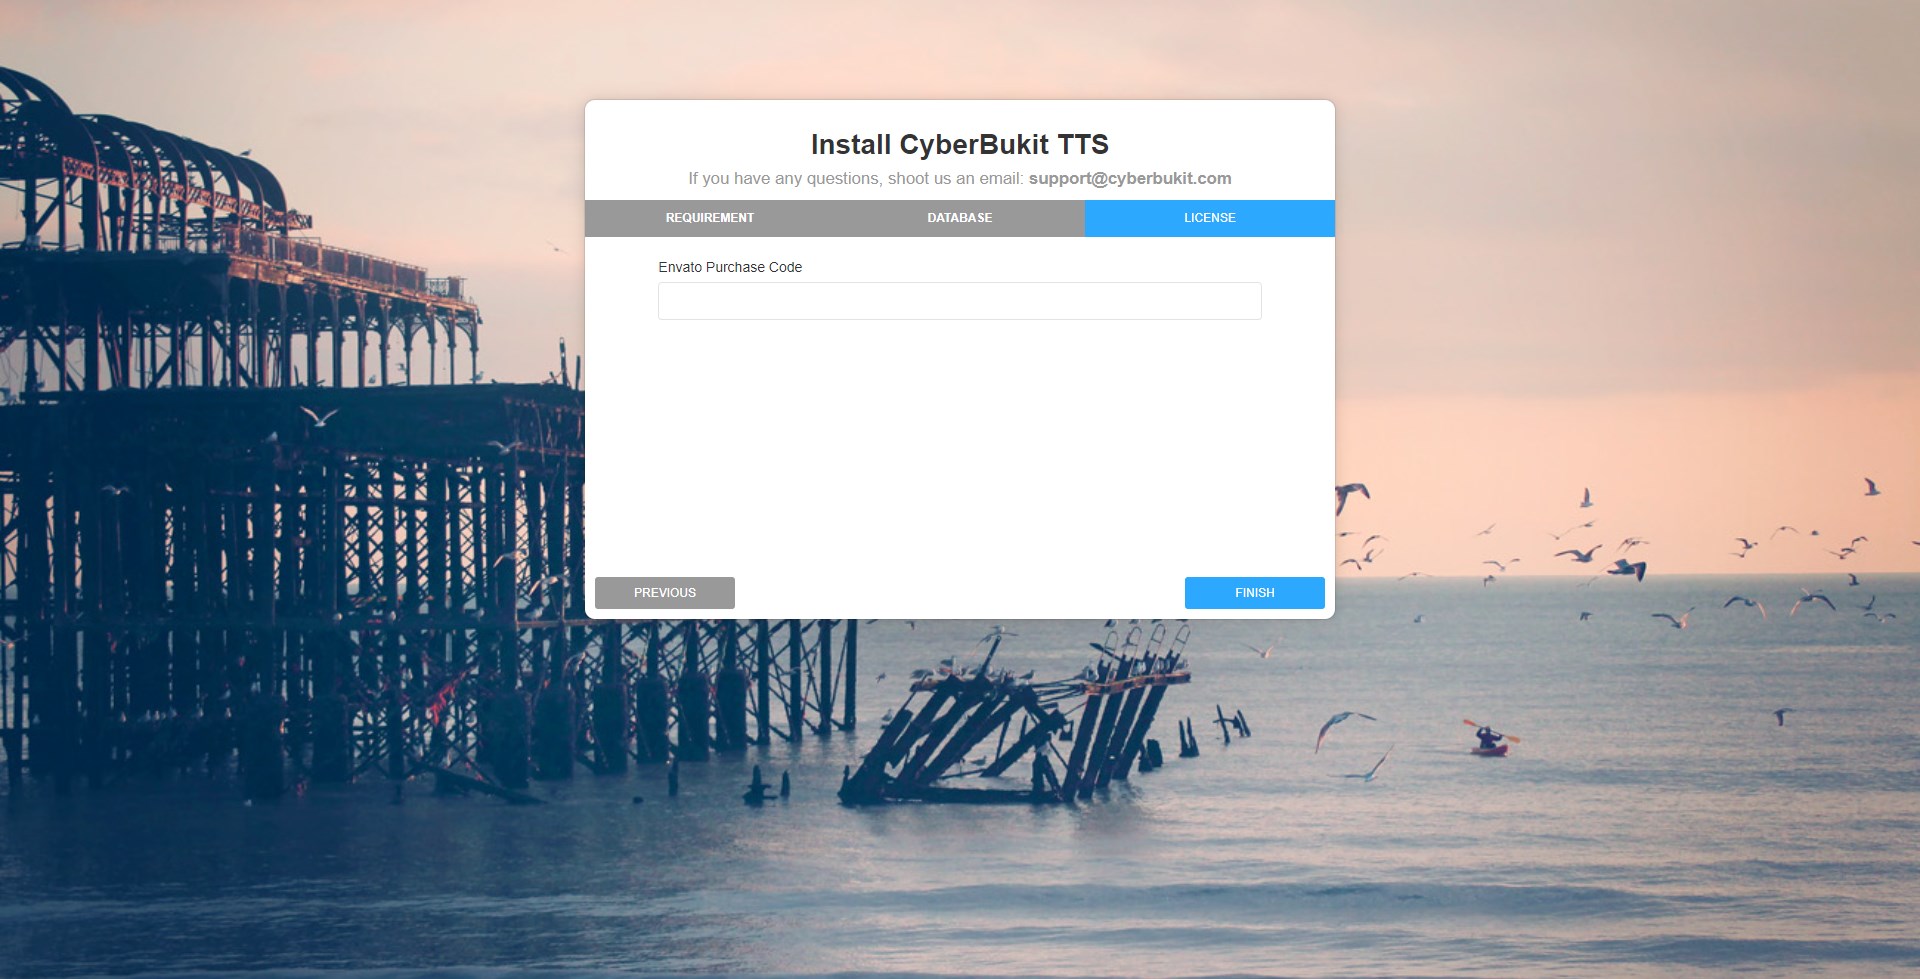
4. Enter Envato Purchase Code
You can find the item's purchase code on Codecanyon's download page.
Copy and paste to the field. You are all set.
Click the Finish button, you will be redirected to the success page if there're no problems. After the successful installation, you should
1. make sure you revoke the writable permission of this directory: application/config 2. remove the whole 'install' directory from your server.
The default super admin credentials is: Username: admin Password: admin Sign in and change as soon as possible.
After successful installation, you should always go to Admin Tools -> Upgrade Software to see whether there is upgrade available. Some uncritical bugfix and small improvements may not be included immediately in the files you download. But in this updater, you will get the latest update.
If you encounter any problems while installing, please contact us through [email protected], we are glad to lend you a hand.
2. Troubleshot of installation
1. I can visit the homepage or sign-in page, but I'm unable to sign-in
Generally, it returns 404 error when you click the 'Sign In' button. Two reasons may cause this:
1. .htaccess file in the root directory is missed. If you upload file by file from Windows to the server, it may happen as files start with a dot are hidden in Windows. Or sometimes when you unzip the file using cPanel unzip tools, the .htacess file will be replaced with an improper one. In this case, you only need to upload the .htaccess again.
2. Your rewrite module is configurated improperly. Make sure the rewrite module is enabled. It usually happens when you are using Nginx. You should make sure you configure the rewrite module in the correct configuration file (e.g in '/etc/nginx/sites-enabled/default' or in '/etc/nginx/sites-available/default').
2. How to enable rewrite module in Nginx
1. Open the configuration file: sudo nano /etc/nginx/sites-available/default (or /etc/nginx/sites-enabled/default, it depends on your OS and setting)
2. Finf the part of your site, and replace 'try_files $uri $uri/ =404;' with 'try_files $uri $uri/ /index.php?$args;'
3. Restart the HTTP server: sudo service nginx restart
3. Add or remove language
This guide works for all CyberBukit scripts.
CyberBukit script is multiple languages ready. There are three language switchers in the script. 1. at the bottom of all front-end pages 2. at the right-top of the back-end dashboard 3. a language selector at My Profile page of each user
Here are some cases you may have.
Use English Only
The script only comes with English. The Spanish language switcher is only used for demonstration(not translated). If you only need English, you can remove the language folder located at application\language\spanish.
Add Multiple Languages
If you want to add a new language, you can copy the whole folder located at application\language\english, rename the folder to your language name, and then translate all the fields in the folder files. Please note that the folder name should be in lower case.
Once you add the language folder, it will be displayed at the language switcher.
Please note that you should always only copy the english folder, and never remove or rename the english folder.
Change the default language
The default language is English.
You may need to change the default language after translation. Here are the steps: 1. Copy the whole folder located in application\language\english, and rename to your language name in lower case. 2. Copy the whole folder located in system\language\english, and rename to your language name in lower case. 3. Open application\config\config.php, go to line 92, replace 'english' with your own language name. Make sure it's consistent with the language's folder name. It should be in lowercase.
Please note that you should copy and then rename the english folder, instead of renaming it directly.
If the visitor changes the language, his chosen language will be displayed when he comes next time since the language option is stored in his cookie.
4. Customize front-end
This guide works for all CyberBukit scripts.
The front-end comes with about 10 necessary pages. All pages except the homepage are related to the database. You may need to customize the header, footer and homepage. Here is the file location of these pages, you can open and edit directly. 1. homepage : application\views\themes\default\Front\index.php 2. header : application\views\themes\default\Front\header.php 3. footer : application\views\themes\default\Front\footer.php
If you want to change the whole style of the script, you need to edit the css file: 1. Front-End CSS: assets\themes\default\front\css\front.css 2. Back-End CSS: assets\themes\default\css\sb-admin-2.css
5. Payment Item (or Package) Setting
You may see 'Package Management' or 'Payment Item' in your script. It's the same meaning. Here we use the word 'Package'.
1. Package Type
There are three types of package available.
Purchase: It's a one-time purchase, a user buys the package, and he can do or own something.
Top-up: When a user wants to reload his balance, he buys a top-up package, and the corresponding amount will be reloaded to his account's balance.
Subscription: It's a recurring payment, a user will automatically be charged every (n) day/month/year.
2. Access Code
It's used to control the accessibility of a package, say, you are promoting a package on Facebook Ads. You only want to let the user from Facebook Ads see the specific package, in this case, you can set an Access Code for the package.
Once you set the Access Code for a package, the user can see the package only when he visits through https://your_siite.com/redirect?from=AccessCode, and he will only see packages with this Access Code.
When a user visits the site with Access Code, it's only valid within the PHP session's time-out period. It depends on your server's setting, generally speaking, it's 24 minutes. That means Access Code will be invalid after he stays at the site without any actions or leaves the site.
3. Purchase Times Limit
You can limit the times of purchase for a package. It's useful in the cases as follows.
It's a trial package of $0. It's a free package so you may want the user to purchase only once.
It's a life-time package. Life-time means the user only needs to buy once.
In these two cases, you might need to limit the purchase times to 1.
4. Access Condition
The precondition of buying a package, see the example as follows.
You set up a Booster Package, but you require the user to buy the Basic Package first, in this case, Basic Package is the Booster Package's access condition. The user won't be able to buy the Booster Package if he doesn't buy the Basic Package.
5. Recurring
When the package type is a subscription, you need to set the proper value for 'Recurring Interval Unit' and 'Recurring Interval'.
Recurring Interval Unit, like 1, 2,3 day/month/year, the number 1, 2, 3 is an interval unit.
Recurring Interval, like 1, 2,3 day/month/year, the day/month/year is an interval.
The setting as follows means the subscription will be updated every 7 days (The user will be charged every 7 days).
6. Renew or Reset Action
When the package is a purchase package, the setting determines whether the available resource will be reset on the month's first day.
When the package is a $0 subscription package, the setting determines whether to stop renews on its expired date. It's useful for a trial subscription.
7. Package Description
Description of the package, one line, one critical information. It will be shown line by line with an ICON in the package list(Pay Now in the dashboard or Pricing in the Front-End) accordingly.
8. Assign a free package for a user when signs up
You can assign a $0 package to a user when he signs up through Generally Setting as follows.
6. Payment Setting (Paypal)
PayPal Setting
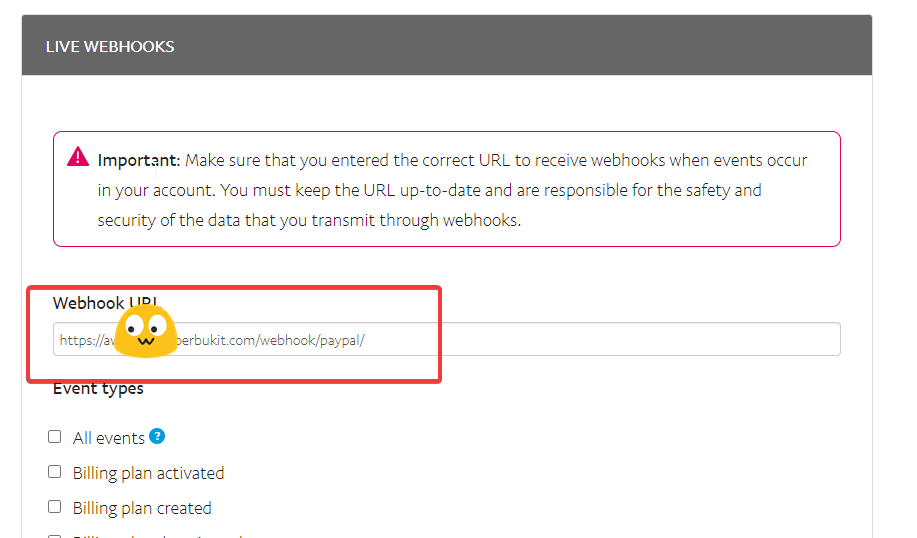
1. Sign in the CyberBukit script, go to Finance -> Payment Setting -> Paypal Payment, copy the URL in 'Webhook URL' and 'Live Return URL' including the slash at the end of the URL.
3. Click 'Create App', enter your App name and click Create App. Then you will be directed to the successful page. 'Client ID' and 'Secret' are shown on this page. Copy and save them in a safe place.
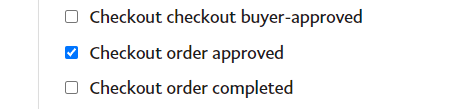
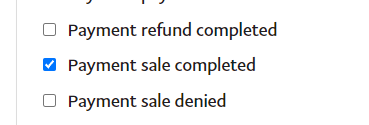
4. Scroll down to 'LIVE WEBHOOKS' on the same page, click 'Add Webhook', paste the 'Webhook URL' you just copied from CyberBukit script, and tick 'Checkout order approved' and 'Payment sale completed', It should be like the following:
and
and
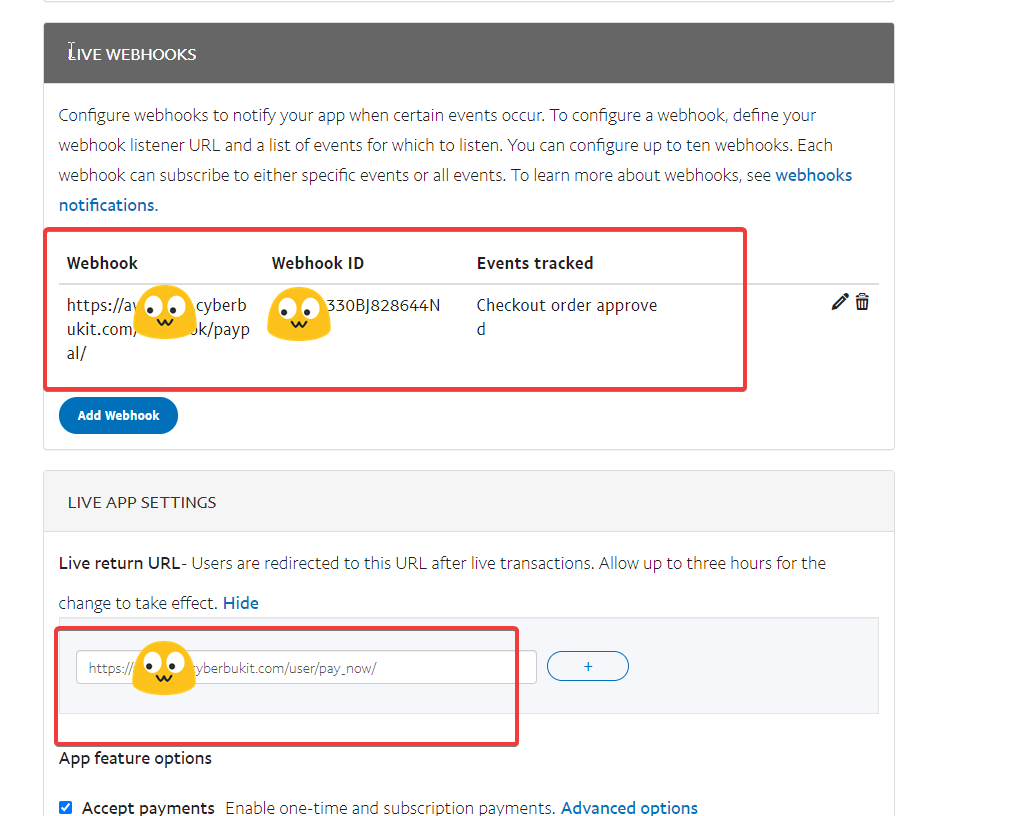
Click Save. It'll be saved and the 'Webhook ID' will be shown on the page, Copy and save the 'Webhook ID' in a safe place.
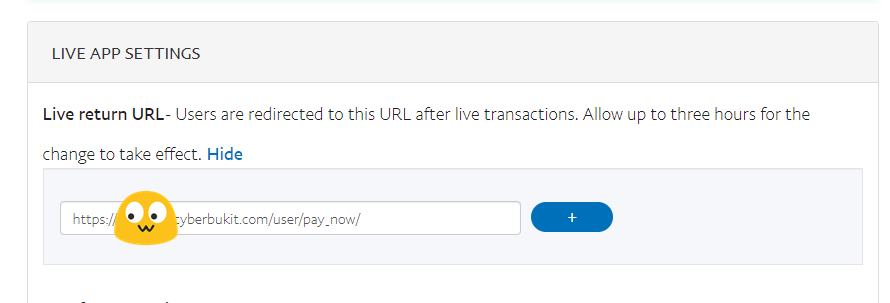
5. Scroll down to 'LIVE APP SETTINGS' on the same page, paste the 'Live return URL' you just copied from CyberBukit script, it should look like the following:
Click Save
Overall, it should look like the following:
6. Now you have got 'Client ID', 'Secret' and 'Webhook ID', Go back to CyberBukit script payment setting page, and paste them to the PayPal's corresponding field.
7. Payment Setting (Stripe)
Stripe Setting
1. Sign in the CyberBukit script, go to Finance -> Payment Setting -> Stripe Payment, copy the URL in 'Webhook Endpoint URL' including the slash at the end of the URL.
3. Go to Webhooks at the Stripe dashboard, Click 'Add Endpoint', paste the 'Webhook Endpoint URL' you just copied from CyberBukit script. Add two events: 'checkout.session.completed' and 'customer.subscription.updated', it should be like the following(The version should be 2020-03-02):
Click 'Add endpoint'. You will see a successful page. Copy the 'Signing secret' in this successful page. It should be like the following:
4. Go to Developers -> API Keys at the Stripe dashboard, you will see your 'Publishable key' and 'Secret key'. If there does not exist, create one pair and save them in a safe place.
5. Now you have got 'Publishable key', 'Secret key' and 'Signing secret', Go back to CyberBukit script payment setting page, and paste them to the Stripe's corresponding field.
3. Click Submit, you will get your SITE KEY and SECRET KEY
4. Copy the two keys respectively, Sign in to the script as the super admin, go to Global Setting -> Auth Integration, tick Enabled and paste the two keys.
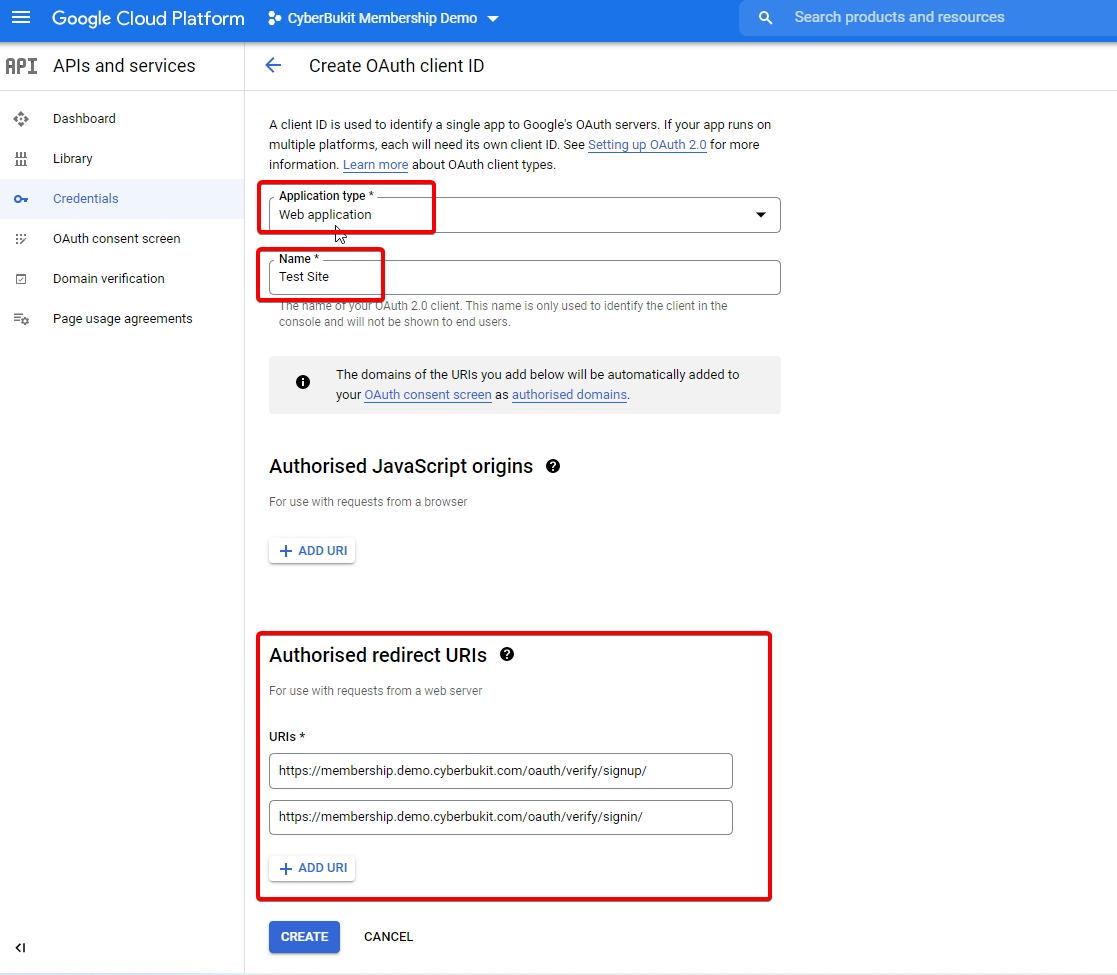
3. After clicking CREATE, a modal window with credentials will pop up.
4. Copy the Your Client ID and Your Client Secret, Sign in to the script as the super admin, go to Global Setting -> Auth Integration, go to the Google Login block, tick Enabled and paste the two credentials
For(7), here are the APP ID and APP Secret that you need to paste into the script.
8. Copy the APP ID and APP Secret, Sign in to the script as the super admin, go to Global Setting -> Auth Integration, go to the Facebook Login block, tick Enabled and paste the two credentials
Click Save Changes.
11. Reset purchase code
1. When do you need to reset your purchase code?
Once you want to install the script with another domain or migrate to another server with a different IP address, you should reset your purchase code and re-install again. This operation won't affect any of your existed data. It just updates the license.
2. How to reset your purchase code?
Sign-in as super admin, Go to Admin Tools -> Software License, click Unistall License. After clicking the uninstall button, you won't be able to sign-in any more.
3. How can you do if you forget to uninstall the purchase code before migration?
Please send us an email along with your purchase code or raise a ticket, we will reset manually.
12. How does the purchase code work?
1. When do I need my purchase code?
When you purchase the item from Codecanyon, you will get a file about license certification and purchase code at their download page. Purchase code is required when you install the script. You will be asked to enter the purchase code at the last step of the installation.
2. How does the purchase code work?
The basic license policy is one purchase code, on active installation. You can install the script in the same server with the same domain unlimited times. But once you change the domain or server, you need to reset the purchase code and install again. As per how to reset the purchase code, please read here.
13. .htaccess file is missed
We have found that sometimes the '.htaccess' file in the script's root directory will be missed if you use the cPanel online extract tool to unzip your file.
On the other hand, if you upload file by file from Windows, sometimes the .htaccess file is also missed.
It's easy to resolve. The .htaccess file is contained in the zip file you downloaded from Codecanyon. You only need to unzip and re-upload it to the remote script's root directory.
14. API Documentation
CyberBukit script comes with a simple RESTful API. The main purpose of the API is to let CyberBukit script works with your other APPs. For example, you create a mobile app. Then you can verify the user's credentials through the API when user signs in your app. That means you use CyberBukit's user database as your APP's. The API is also applicable for sign-up and the reset-password request.
You need to upgrade to the latest version before use. Go to Admin Tools -> Upgrade Software to see whether it's the latest version.
First of all, you should enable the API from the super admin dashboard: Global Setting -> General Setting -> Enable API.
The base URL of the API is http(s)://your_host/api/v1/{{method}}
For example, you use the GET method to get the system's status: https://your_host/api/v1/status, it will return some JSON data describing the status.
No authentication required for the API as all the methods are for public use purpose.
In some cases, you may want to restrict the source IP of the API calls. Follow the instructions to achieve this: 1. open application\config\rest.php, go to line 233, set it true. Go to line 258, enter your IP address. 2. open application\controllers\Api_v1.php, go to line 10, set it false.
You can test all the API methods in Postman.
1. GET /status
URL: http(s)://your_host/api/v1/status
Feature: It returns the status of the system.
Request: Not Required
Response:
{ "status": true, "message": "The system is running" }
2. GET /signin
URL: http(s)://your_host/api/v1/signin
Feature: Verify when user signs in, check the user's credentials and return the user's profile.