
Guideline of AWS Polly & S3
AWS offers TTS service(named Polly) and storage service(named S3). There are several facts you may need to know.
1. AWS Polly offers two types of voice, Standard and Neural. The standard voice sounds like a robot, but the price is low. The neural voice sounds like a real person, but the price is a bit higher.
2. AWS offers free tier in the first 12 months, starting from using Polly. The free tier includes 5 million characters per month for standard voice and 1 million characters per month for neural voice.
3. After using up the free tier, you will be billed $4.00 per 1 million characters for standard voice or $16.00 per 1 million characters for neural voice.
4. As per what's the concept of 1 million characters, please see https://aws.amazon.com/polly/pricing/
5. With up to 3000 characters, you can save the TTS file to your server or S3. For more than 3000 characters and up to 100,000 characters, your TTS file must be saved to S3.
Let's assume you already have an AWS account. Create it if you haven't. https://portal.aws.amazon.com/billing/signup
Steps of configuration on AWS
1. Sign in as root user
https://console.aws.amazon.com/console/home
2. Create an IAM user (3 steps)
Step 1. Search 'IAM', go to IAM dashboard
Step 2. Click 'Users', Click 'Add user', fill in a username, tick 'Programmatic access', click 'Next: Permissions'
Step 3: Select 'Attach existing policies directly', tick 'AmazonPollyFullAccess' and 'AmazonS3FullAccess' in the table.
Click 'Next: Tags', Click 'Next: Review', you may see the review page like the following:
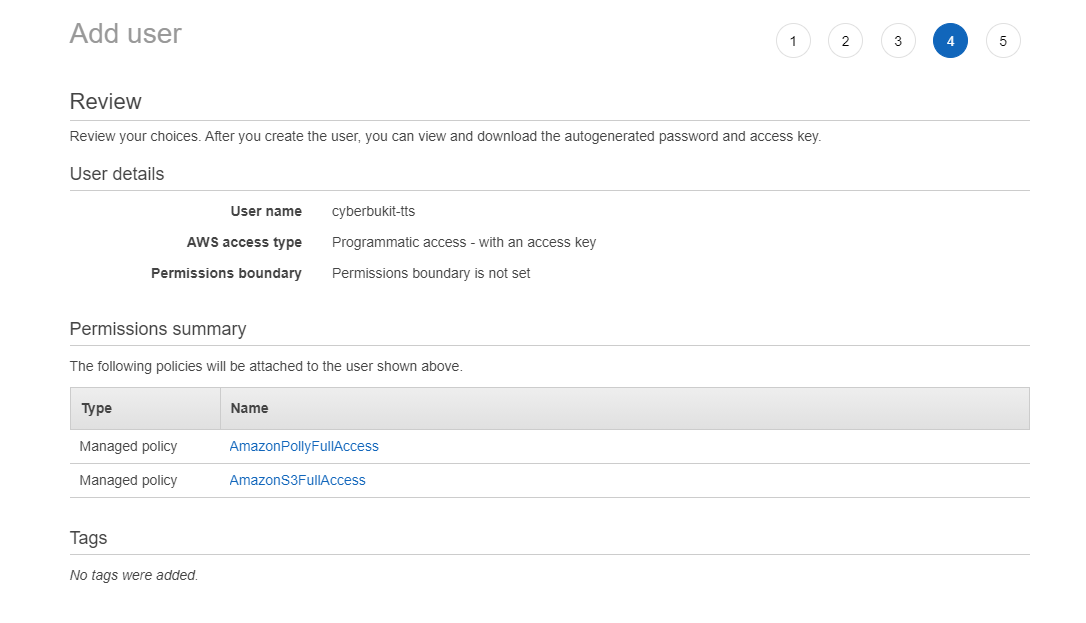
Step 4: Click 'Create user'. You will be redirected to the success page and will see the 'Access key ID' and 'Secret access key', make sure you copy or download and save them at a safe place. This is the only time that the secret access keys can be viewed.
3. Create an S3 Bucket (5 steps)
Step 1. Search 'S3', go to Amazon S3
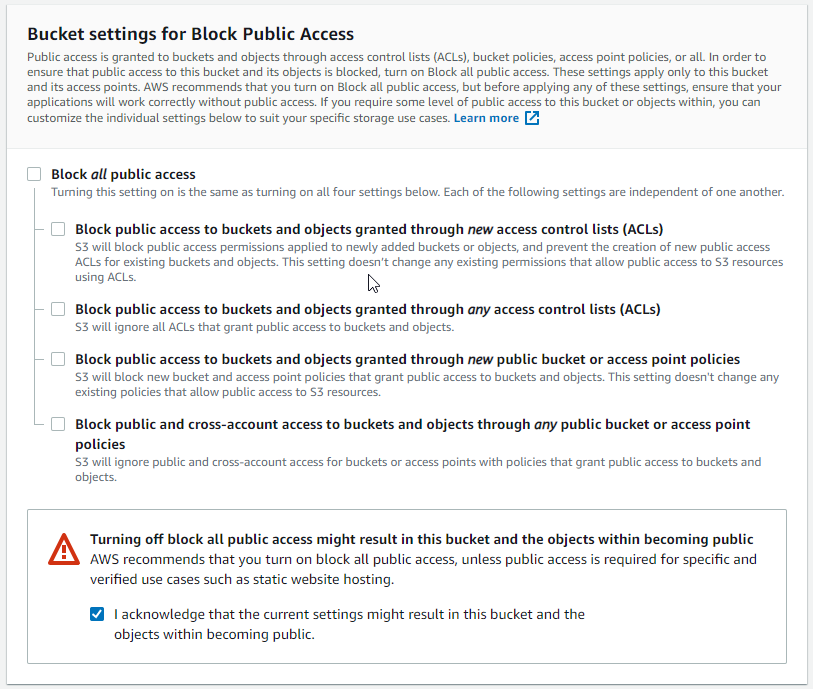
Step 2. Click 'Create bucket', fill in a bucket name, choose the region, untick 'Block all public access' and tick 'I acknowledge that...', for this part, it should like the following:
Step 3. Click 'Create bucket'
Step 4. Go to the bucket you just created, click 'Permissions', scroll to 'Bucket policy' and click 'Edit', paste the following policy JSON code. Please note that 'cyberbukit-tts' at 'Resource' key is the bucket name, it should be replaced with your bucket name that just created.
{
"Version": "2012-10-17",
"Statement": [
{
"Sid": "PublicRead",
"Effect": "Allow",
"Principal": "*",
"Action": [
"s3:GetObject",
"s3:GetObjectVersion"
],
"Resource": "arn:aws:s3:::cyberbukit-tts/*"
}
]
}
Click 'Save Changes'
Step 5. Scroll to 'Block public access' part, click 'Edit', tick the first three options and click 'Save changes', it should like the following:
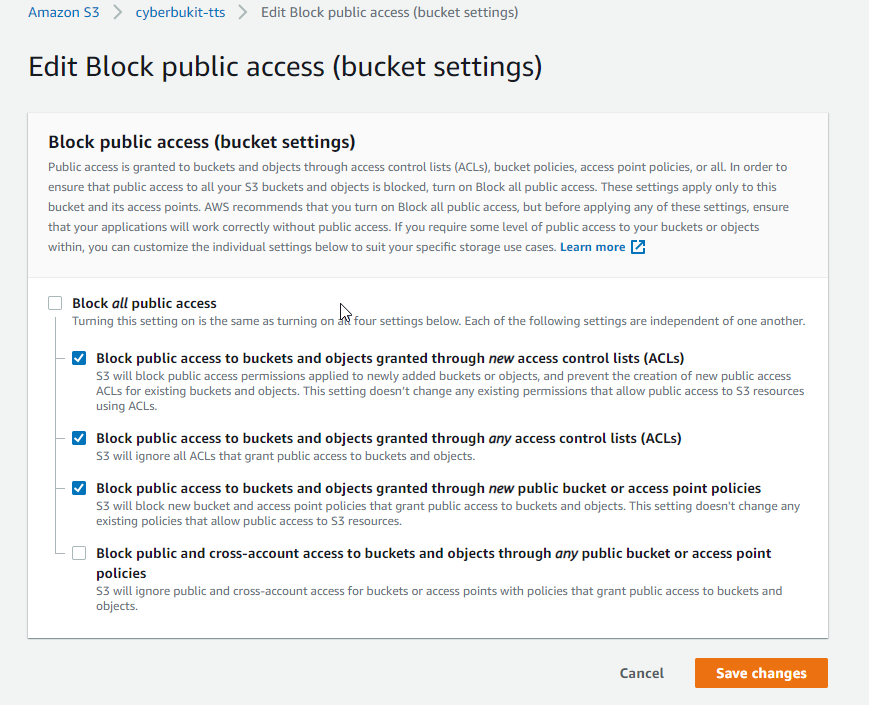
Click 'Save Changes'
This is the end of the configuration on AWS.
Steps of configuration on CyberBukit TTS
According to the guideline from AWS, considering the safety reason, the credentials of AWS service should be saved as a file outside the web directory. Please follow the steps to finish the configuration.
1. Create a new file to save the AWS IAM credentials. It's a pure text file. The content of the file should be:
[default]
aws_access_key_id = your_aws_access_key_id
aws_secret_access_key = your_aws_secret_access_key
Replace your_aws_access_key_id and your_aws_secret_access_key with your real credentials (The credentials come from the step of creating an IAM user). Do make sure the '[default]' snippet is not missed.
As an example, we save the file named 'aws_credentials', we upload it to '/var/www/config/'. So the 'Configuration File Path' is '/var/www/config/aws_credentials'. Do make sure this directory(/var/www/config/) cannot be visited from the internet.
Please note this path(/var/www/config/aws_credentials) is only an example, it varies depending on your server. Overall, it should be the file's absolute path in your server.
2. Sign in as super admin on CyberBukit TTS, go to TTS Management -> TTS Configuration, at 'AWS Polly & S3 Setting (TTS & Storage)' part, fill in like the following:

Please note that the 'Region' and 'Bucket Name' should be absolutely the same as you just filled in and chosen on AWS.
Bucket Folder is used to store files in the bucket's sub-folder, if you didn't create a sub-folder on AWS S3, leave it empty.
If you use AWS S3 as the storage solution for the whole site, The voices file generated from AWS Polly will have a two to three seconds' delay. This delay situation also happens when you generate a voice file with the text of more than 3000 characters from AWS Polly no matter what storage solution you use ( This is because AWS forcefully stores the text of more than 3000 characters on AWS S3 ). We have consulted with AWS about this problem, but it seems there is no way to improve this situation.
This is the end of the configuration on CyberBukit TTS.
Before you proceed, please do confirm that your configuration file is stored outside your site's root directory and it can not be visited from the internet.
If you're unsure about this security problem, please submit a ticket, and we'll check for you. Please include your script URL and the value of 'Configuration File Path' (like '/var/www/config/aws_credentials', not the file's content) in the ticket.
Next step, you need to sync TTS resource from AWS Polly, then you will be ready to use. See TTS Resource Management